Armoury Pictures 2016-2017

Easter Armour Collection
Keeping armour at a high polish requires constant work. In
the time before major events and shows an armoury becomes a hub of activity as
pieces of armour of my manufacture and manufactured by many others need a
skilled Frobisher (metal polisher) to return them to high presentation
standard.
My reputation earned as the primary Frobisher at Von Becke
armour and Costume keeps me in constant demand for this kind of work.
I took this photograph just before all of the pieces were
about to go back out to the customers.


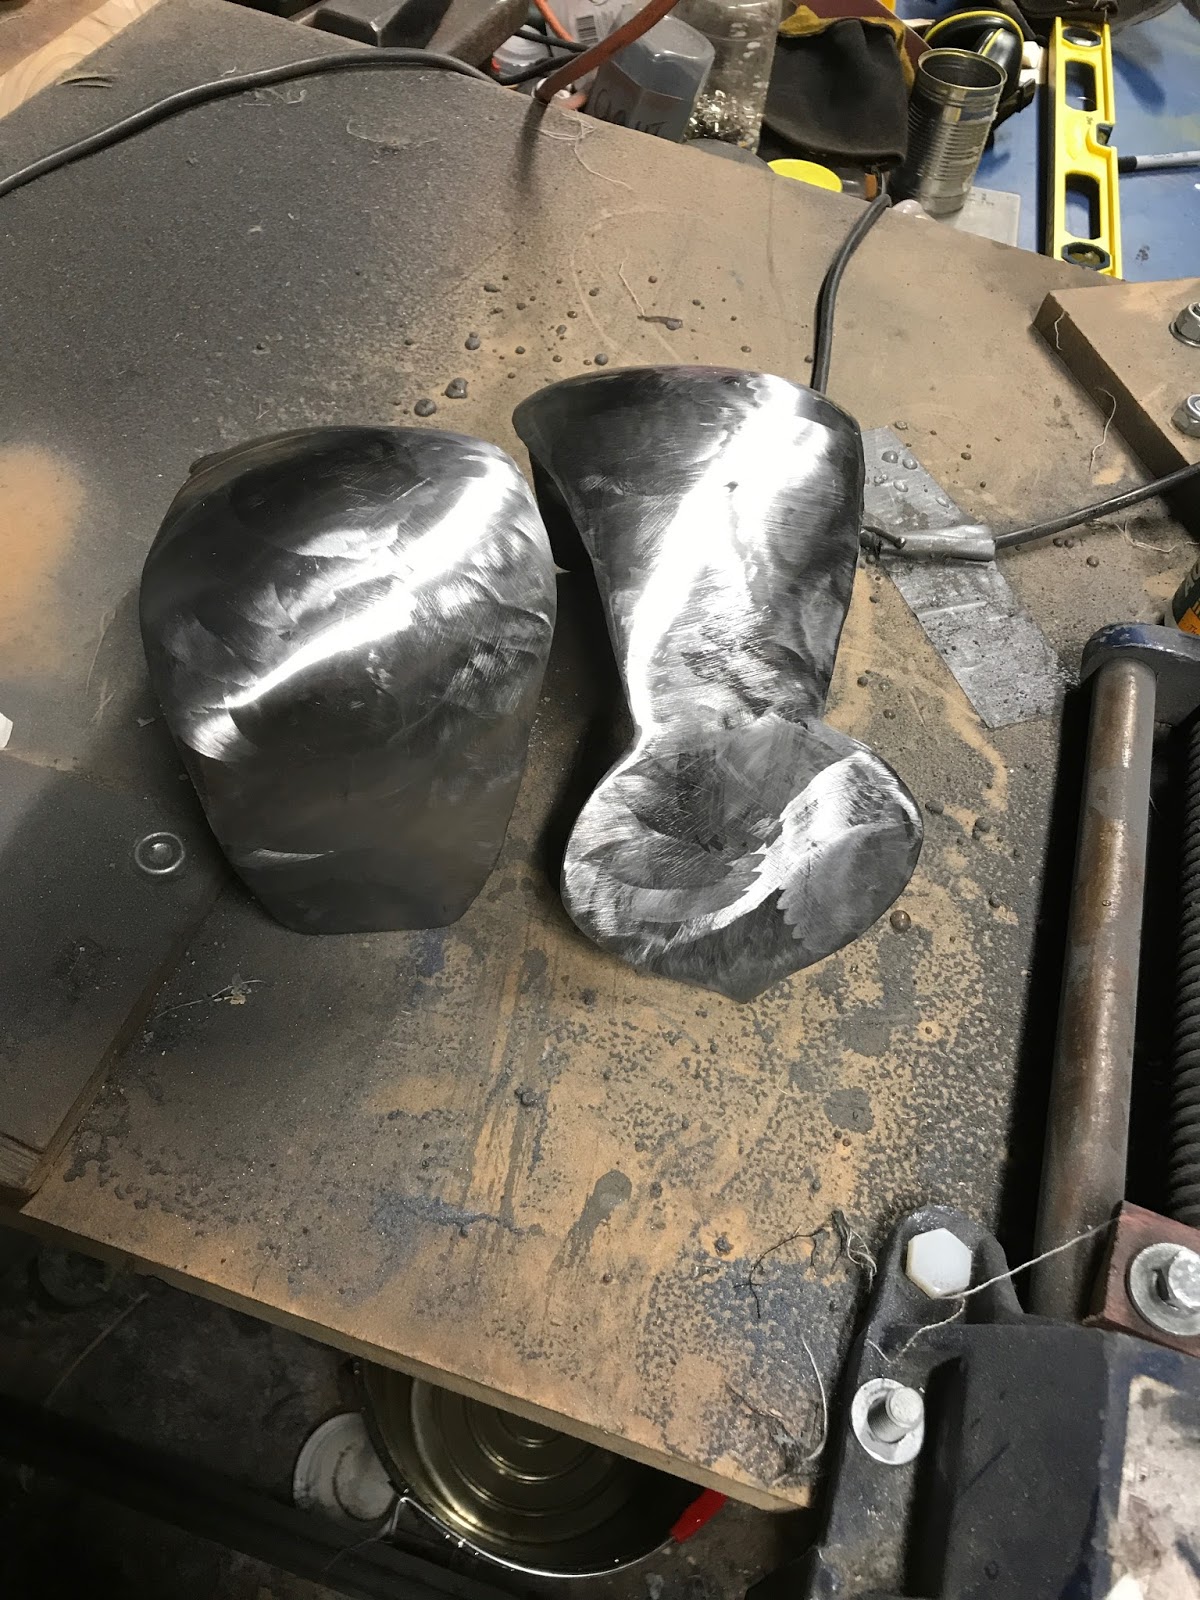
Goliaths shins from the Maciejowski Bible
In July 2017 a client advised that he would like some
replica shins inspired by the Maciejowski Bible rendition of the armour of
Goliath from the Biblical story. The client wished to do the strapping
attachments himself.
A simple curved shin took longer in the fitting than the
construction, and the polishing took longer than both. I was exceptionally
pleased that I could fit the shins snuggly to the client without strapping just
by quality of the fit.
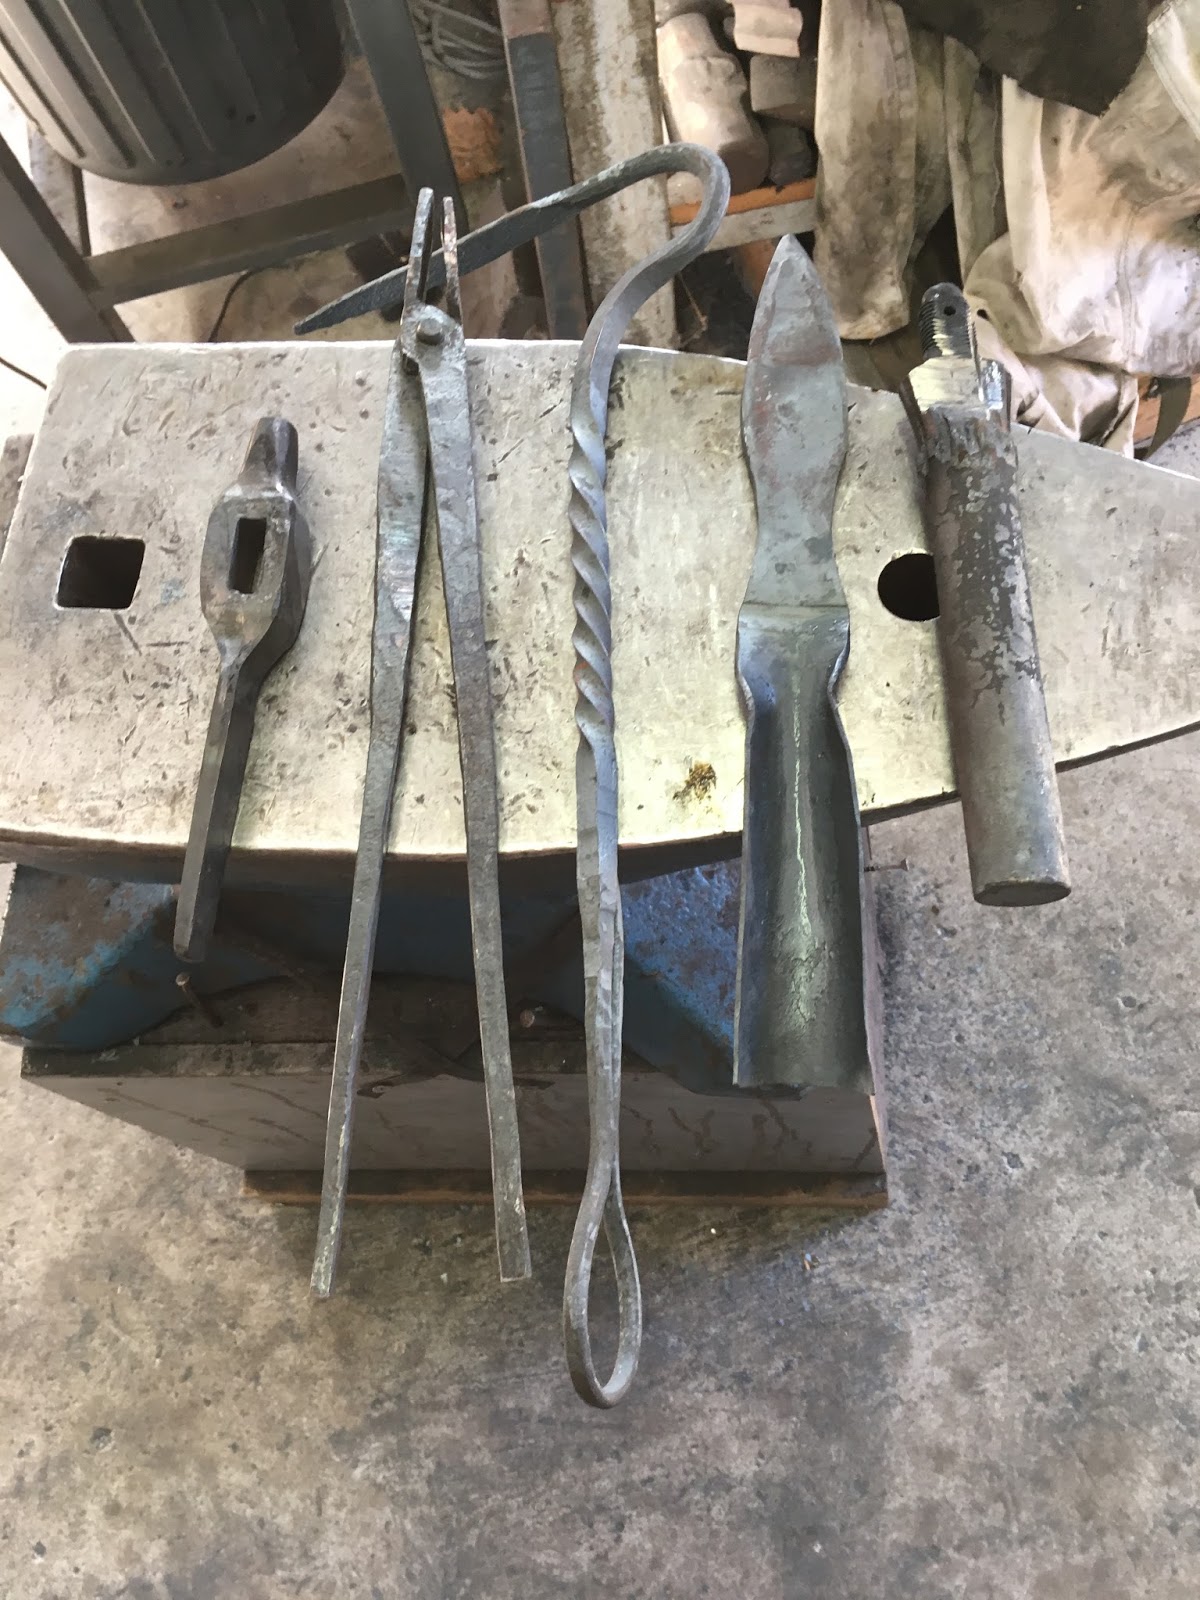
My creations from Tharwa Forge
As an armourer I had previously only done cold work – beaten sheet steel into shape without the application of heat. To expand my skills, I knew I would have to do more work with heat. In January 2017 I took advantage of the Beginners Blacksmith course at Tharwa forge to learn more about this heavily armouring associated trade.
From left to right: A fluting hammer to help me in my armouring;
a pair of basic tongs; a coal scraper (taught to show each basic technique); a
spear head (partially completed); and a notch driver.

Fluting System
In the previous photograph I showed the freshly created head of the fluting hammer. This photograph shows the hammer I attached to the head; the modified railway track with fluting groove; and several sets of knees that I fluted using the tools pictured. The hammer lying below the fluting hammer is a polished face plenishing hammer.
I would rate the work on the knees as munitions grade. Putting a sharp flute on a knee rounded in two directions is a skill that takes time to master.
I achieved a quality line by the fifth and sixth knees (not pictured) that I created using this method.
From another armourer in South Australia I learnt of a jig that holds the fluting hammer and I will investigate this method before my next commission involving extensive fluting.
Mechanically achieved pattern
This distinctive pattern was developed by insufficient
mobility of the work under the mechanical belt sander part of polishing. I kept
it as a technique reference photograph for ideas for modern pieces.

Manual Hammering Patterns

Repousse and chasing with Douglas Pryor


Strathnairn Bronze Foundry Course
Over ten weeks in 2016 at Strathnairn Arts Association
I: learned about bronze casting; I
created my own wax; invested the wax; attended the pour as an observer; removed
the plaster from the wax; researched multiple ways of finishing a wax, and then
taught a quick session on how I used my skills as a Frobisher to put an
extremely high polish finish on my piece using modern means, and how those
means could have been replicated using the hand powered methods of 500 years
ago.
My understanding was that I could use a mould to create a precise
replica of a spear, but I was fascinated by the bandage method, and made a more
primal version. The end result looked like an archaeological grave goods find.


Workstation design and construction
Armouring, Blacksmithing and Frobishing all require the
creation of highly customised and specialised workstations. The repetitive
motions can cause injury if you don’t have a sound understanding of ergonomics.
Of course, this understanding is useless unless you can execute the designs you
have conceived.
Pictured above are the stations I have crafted using my
knowledge of woodwork. Wood was chosen over steel for wood’s noise deadening
qualities. I have supplemented the woodwork with mechanical plates. I also
intend to blacksmith iron hoops once I have used these items for long enough to
be certain the dimensions are correct.